
First, What Happens When You Press the Power Button?
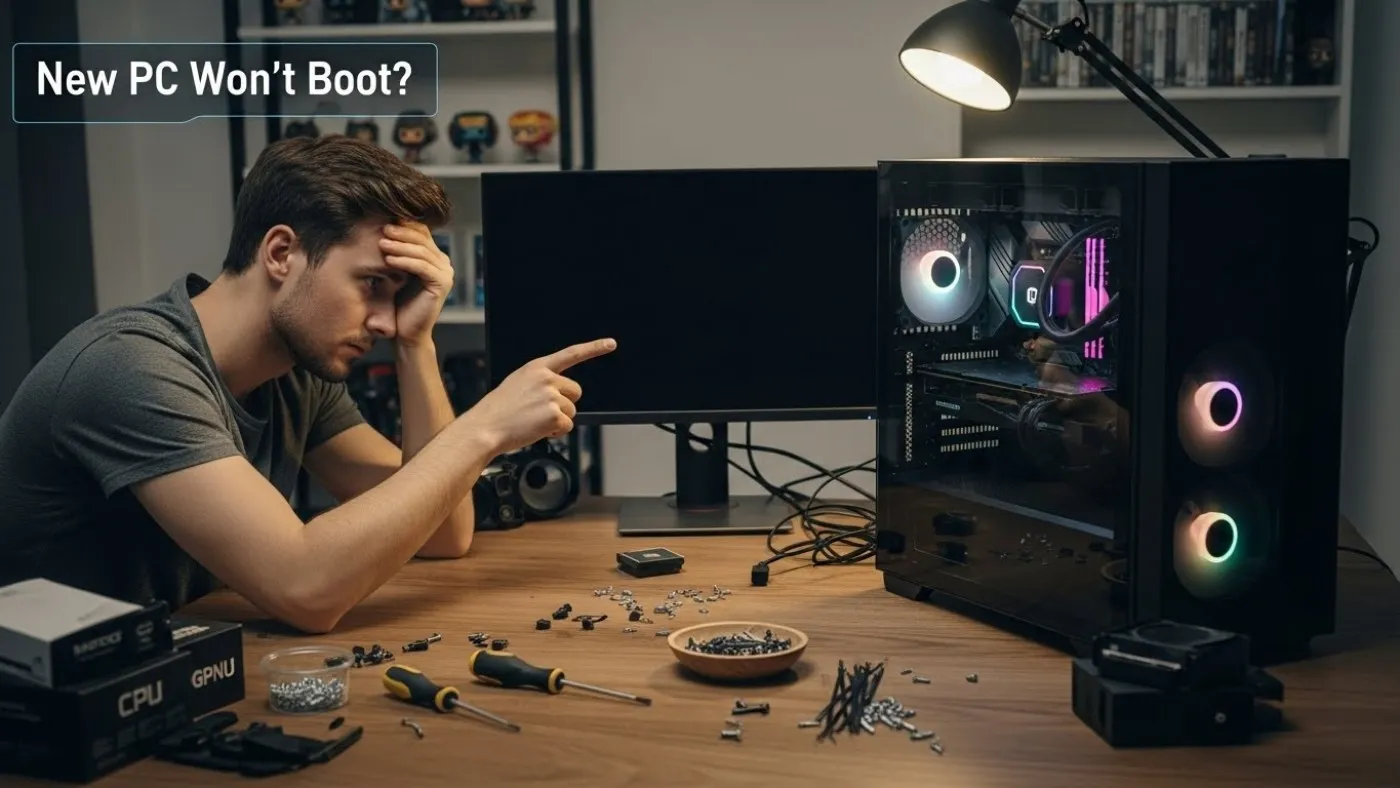
So your new PC won’t boot? But before you start removing parts, look carefully at what the PC actually does when you press the power button. A completely dead PC needs a different troubleshooting path from one with spinning fans and a black screen.
It also helps to understand three terms. Powering on only means parts of the system are receiving power. POST (Power-On Self-Test) is when the motherboard initializes essential hardware such as the CPU, RAM and graphics. Booting comes after POST, when the PC attempts to load an operating system.
Find the symptom that best matches your new PC below and start there.
| What Happens | What It Usually Points Toward | Where to Start |
|---|---|---|
| Nothing happens at all | Power, PSU, front-panel wiring or motherboard | Start with the power checks |
| Fans briefly twitch and stop | Power connection, protection shutdown or possible short | Start with the power checks |
| Fans and RGB stay on but there is no picture | Display, GPU, RAM or POST problem | Go to the no-display section |
| CPU, DRAM, VGA or BOOT light stays on | POST has stopped at a particular stage | Go to the debug-light section |
| PC repeatedly starts and restarts | Memory training, RAM, BIOS or hardware initialization | Go to the restart section |
| BIOS appears | The PC has successfully POSTed | Go to the BIOS and boot section |
Do not start pulling components out at random. Follow the troubleshooting path that matches what your PC is actually doing.
PC Does Absolutely Nothing When You Press Power
If pressing the power button produces no fans, RGB or other response, start with power delivery. Work from the wall toward the motherboard before suspecting failed hardware.
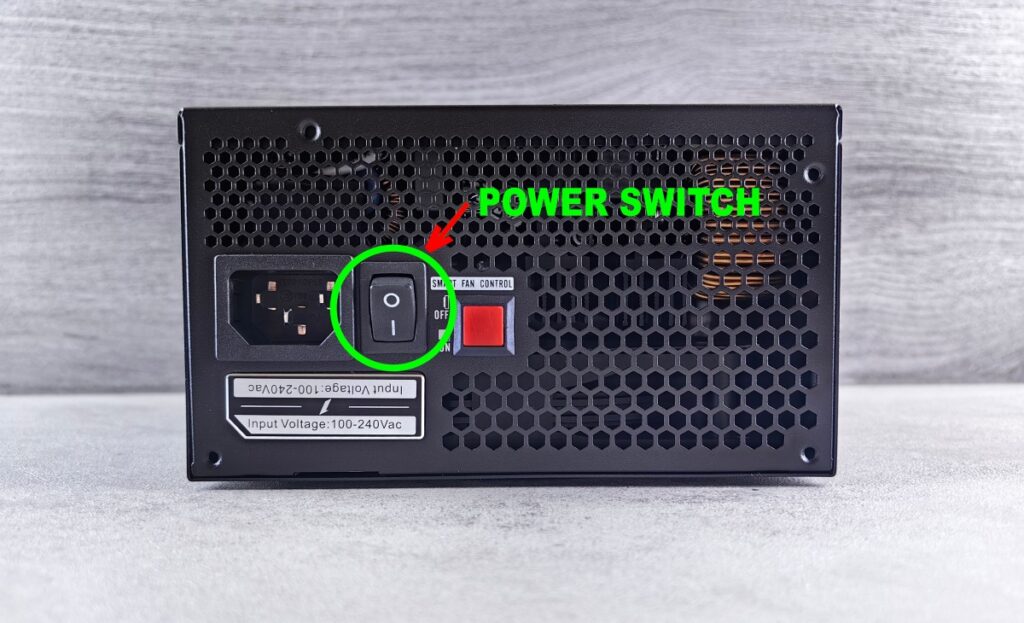
Check the PSU Switch, Wall Power and Power Cable
Make sure the PSU’s rear switch is set to I (on), then test the wall socket or power strip with another device. Reseat the mains cable at both ends and, if possible, try another compatible power cable.
If the PC remains completely lifeless, move inside the case.
Reseat the 24-Pin Motherboard Power Cable
Switch the PSU off and unplug the PC. Remove and reconnect the large 24-pin ATX motherboard cable, pressing it in firmly until its locking tab engages. Check that the connector sits evenly and is not slightly raised on one side.
Check the CPU EPS Power Connector
Most modern motherboards also require CPU power near the top of the board, commonly through an 8-pin or 4+4-pin EPS connector. Make sure the required CPU power cable is connected and fully seated.
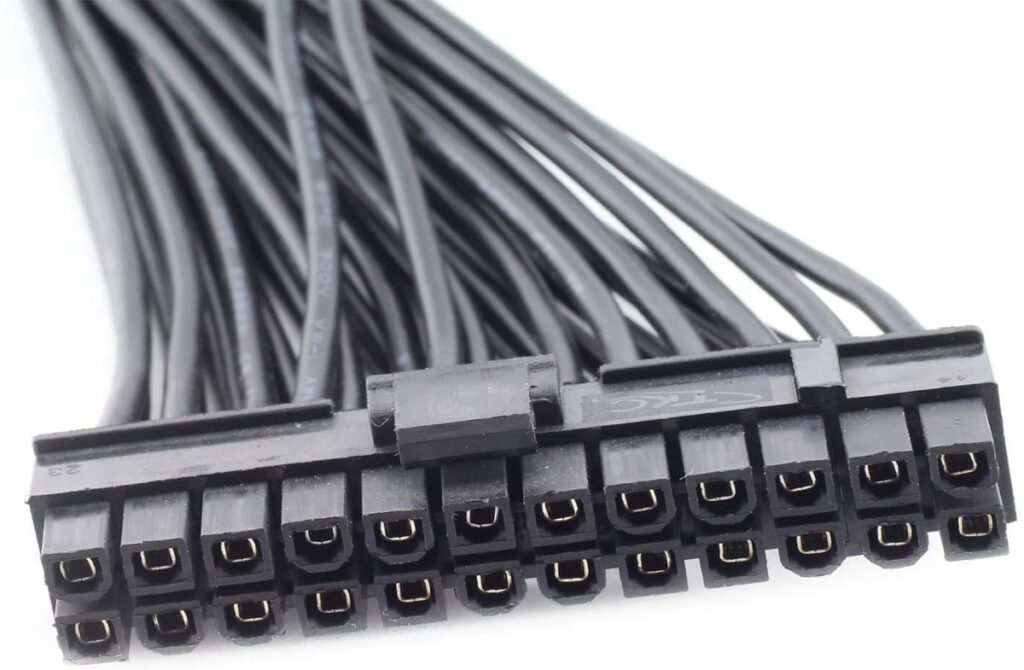
Do not confuse CPU/EPS and PCIe/GPU power cables. Use the connectors specified by your motherboard and PSU manuals. With a modular PSU, never substitute cables from another power supply simply because they physically fit.
Check the Case Power-Switch Connector
Find the front-panel header in your motherboard manual and confirm that the case connector labelled POWER SW or PWR SW is attached to the correct two pins. The power switch itself normally has no positive or negative orientation; it simply needs to bridge the correct pins.
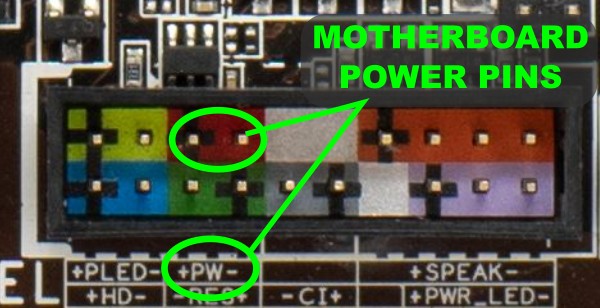
Test the Motherboard Power Pins Directly
If the wiring looks correct, you can rule out the case button by briefly touching the two motherboard power-switch pins together with the metal tip of a screwdriver.
Confirm the exact pins in your motherboard manual first and avoid touching neighbouring pins. If the PC starts this way, the case switch, its cable or its connection is the likely problem.
Check for a Motherboard Short or Standoff Problem
With power disconnected, check that the motherboard standoffs align with its mounting holes and that no extra standoff or loose screw is touching the underside of the board.
If you cannot rule out a case-related short, don’t dismantle everything yet. The minimum-hardware POST test later in this guide will let you test the motherboard outside the case properly.
When Should You Suspect the PSU?
If the outlet works, the PSU switch and mains cable are good, the 24-pin and CPU power connectors are seated, and the case power switch has been ruled out, the PSU becomes a stronger suspect. If you’re also unsure whether the PSU is suitable for the build, check how much PSU wattage your gaming PC actually needs.
The best confirmation is testing with a known-good compatible PSU. Never open a PSU to inspect or repair it yourself; internal components can retain dangerous electrical charge after it has been unplugged. If testing confirms that the PSU needs replacing, use our gaming PC power supply buying guide rather than simply buying a higher-wattage unit.
If a known-good PSU produces the same completely dead system, move on to the minimum-hardware test rather than replacing more parts at random.
PC Turns On but There Is No Display
If the fans and RGB come on but the monitor stays black, the PC has power but may not have completed POST. Start with the display itself, then work back through the GPU, RAM and motherboard diagnostics.
Spinning fans do not mean the PC has successfully booted. They only confirm that parts of the system are receiving power.
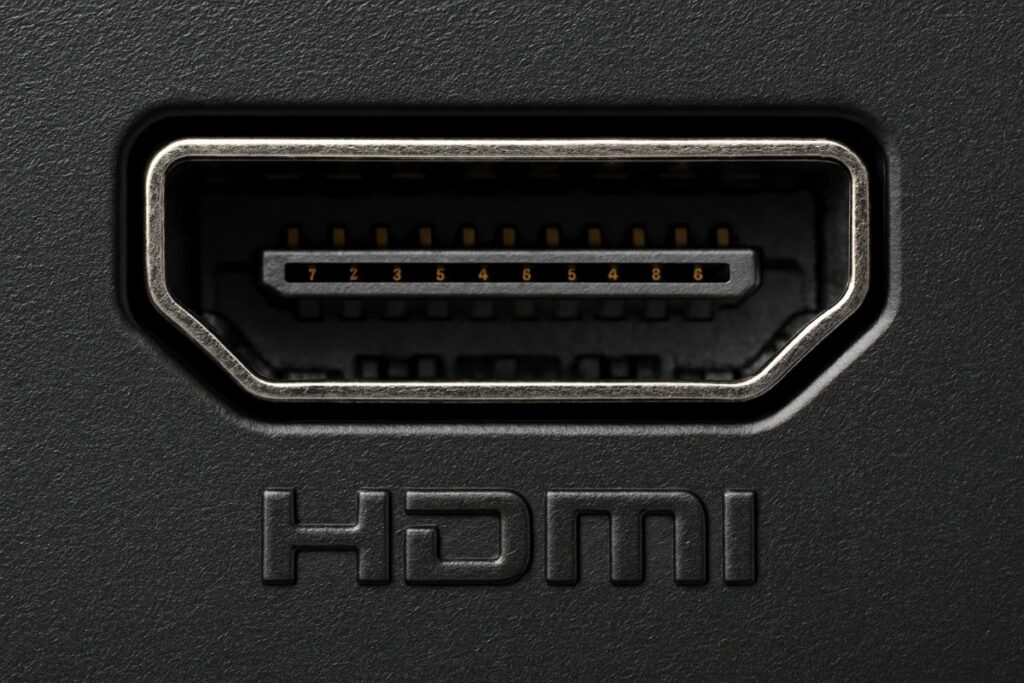
Check the Monitor Before You Touch the PC
Make sure the monitor is powered on and set to the correct HDMI or DisplayPort input. Reseat the display cable at both ends, then try another cable, GPU output or display if available.
If another monitor or TV works, you have isolated the problem to the original monitor, input or cable rather than the PC itself.
Make Sure You’re Using the Correct Display Output
With a dedicated graphics card, your monitor will normally connect directly to the GPU’s HDMI or DisplayPort outputs. Motherboard video outputs only work when the CPU and platform provide usable integrated graphics.
If your CPU does have integrated graphics, the motherboard output can also be useful for diagnosis. If integrated graphics produces a picture but the dedicated GPU does not, focus your troubleshooting on the graphics card, its power or its PCIe connection.
Check the Graphics Card Power
Switch the PC off and unplug it, then check every power connector required by the graphics card. Whether your GPU uses 6-pin, 8-pin, 12VHPWR or 12V-2×6 power, each required connection must be fully seated according to the GPU and PSU instructions.
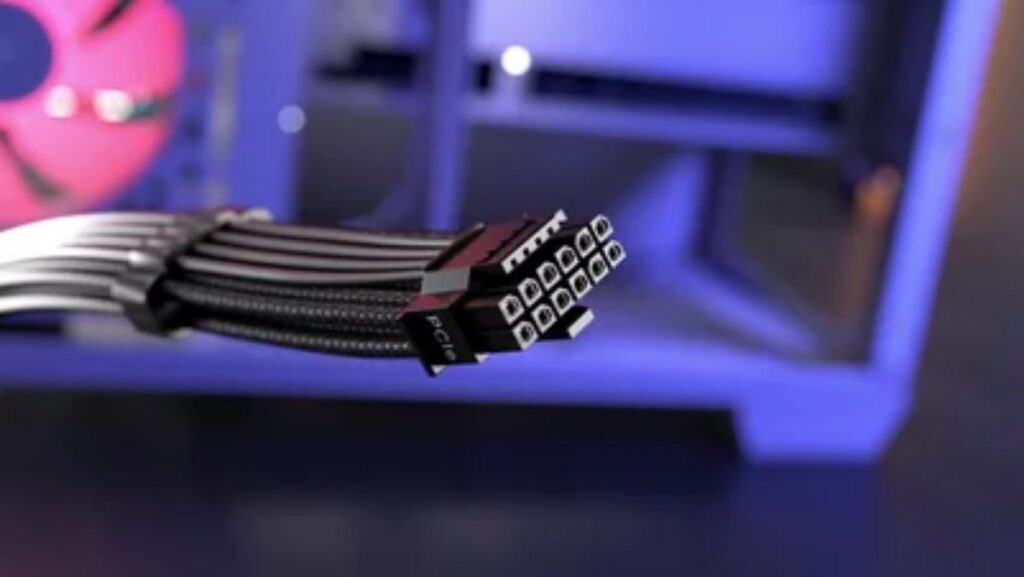
With a modular PSU, only use compatible cables intended for that PSU. Never substitute a modular cable from another power supply simply because it fits.
Reseat the Graphics Card
Remove the GPU and reinstall it firmly in the motherboard’s primary PCIe x16 slot until the retention latch engages, then reconnect its power and test again.
If you are using a vertical mount or PCIe riser, temporarily install the GPU directly into the motherboard. This removes the riser as another possible cause of the black screen.
Reseat the RAM and Try One Stick
RAM that is not fully seated can allow the PC to power on without completing POST. Remove and reinstall the memory firmly, making sure the DIMMs and slot latches are fully engaged.
If there is still no display, test with one RAM stick in the motherboard’s recommended single-DIMM slot, commonly A2. Check your motherboard manual for the correct slot, then test each stick individually if necessary.
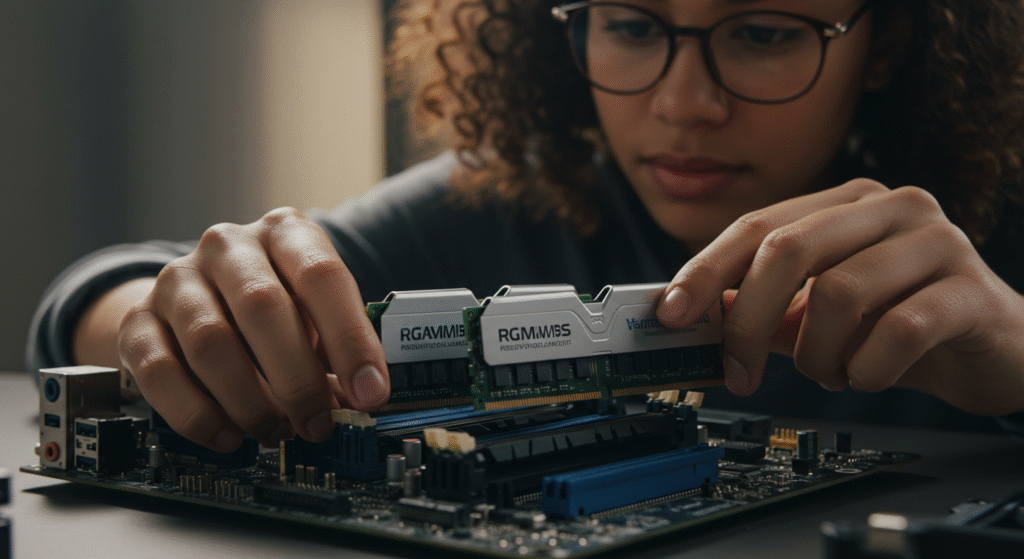
If you have a new DDR5 system and the DRAM light remains on, don’t assume the memory is faulty yet. First-boot memory training can delay POST, which we’ll deal with shortly.
Once the PC is stable, reinstall the remaining memory in the motherboard’s recommended configuration. Our guide to single vs dual-channel RAM for gaming explains why the final memory configuration matters for gaming performance.
Look at the Motherboard Debug LEDs
If the display, GPU and basic RAM checks have not solved the problem, check the motherboard for diagnostic LEDs or a POST-code display.
| Debug Light | Where POST Is Having Trouble |
|---|---|
| CPU | Processor or related initialization |
| DRAM | Memory initialization |
| VGA | Graphics initialization |
| BOOT | Boot-device stage |
Check your motherboard manual because diagnostic behaviour varies between models. Most importantly, a debug light identifies where POST stopped; it does not automatically prove that component is dead.
The next section uses those CPU, DRAM, VGA and BOOT indicators to narrow the problem down further.
Your Motherboard Debug Light Is Telling You Where POST Stopped
If your motherboard has a CPU, DRAM, VGA or BOOT light staying on, use it as a starting point. The light shows which stage of POST is having trouble, but it does not automatically mean the labelled component is faulty.
Check your motherboard manual as well, since diagnostic LEDs and POST codes vary between manufacturers and models.
CPU Debug Light Stays On
Start by checking that the CPU/EPS power connector near the top of the motherboard is fully seated. If the CPU is newer than the motherboard, also check the board’s CPU support list to confirm which BIOS version it requires.
If those checks are good, inspect the CPU installation and socket. On AMD AM4, check the CPU pins for damage. On AMD AM5 and modern Intel LGA sockets, inspect the motherboard socket contacts instead. Also make sure the cooler is mounted evenly and not excessively tightened.
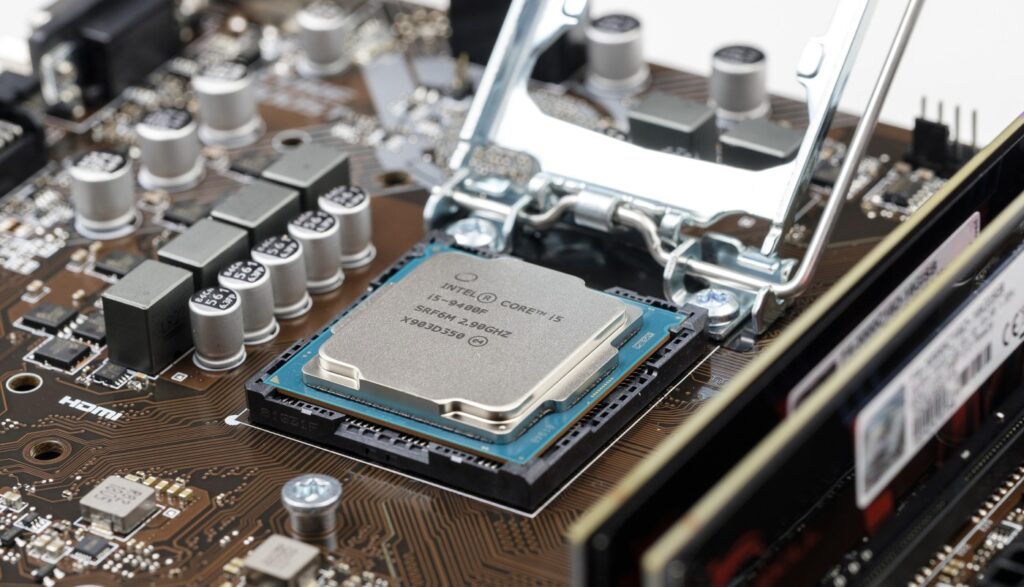
Do not remove the CPU as your first move. Power and BIOS compatibility are easier things to eliminate before disturbing the socket.
DRAM Debug Light Stays On
On a new DDR5 build, give the system time before assuming something is wrong. The motherboard may be training the memory during the first boot, and the DRAM light can remain illuminated while this happens.
If the system still does not POST, reseat the RAM and test one stick in the motherboard’s recommended single-DIMM slot. Test each stick individually if necessary.
If problems continue, clear CMOS and troubleshoot at default memory settings rather than XMP or EXPO speeds. We will cover memory training and CMOS reset in more detail in the next section.
VGA Debug Light Stays On
A VGA light points toward graphics initialization. Check that the GPU is fully seated and that every required GPU power connector is attached. If you use a riser cable or vertical mount, test the graphics card directly in the motherboard’s primary PCIe slot.
If your CPU provides integrated graphics, remove the dedicated GPU and test the motherboard display output. A successful POST this way gives you strong reason to investigate the graphics card, its power or its PCIe connection further.
If possible, cross-testing the GPU in another working PC, or testing a known-good GPU in this system, is far more useful than assuming the VGA light means the card is dead.
BOOT Debug Light Stays On
A BOOT light is different from CPU, DRAM and VGA errors. The system has progressed through the earlier stages of POST and is now having trouble finding or using a boot device.
If you can enter BIOS, check whether your SSD or other system drive is detected. On a completely new build, remember that a blank SSD has nothing to boot yet — you will need bootable operating-system installation media.
Do not start reseating the CPU or GPU because the BOOT light is on. At this point, focus on the storage device, Windows installation media and boot configuration. We will handle those later in the guide.
New PC Keeps Restarting or Seems Stuck on First Boot
If your new PC repeatedly restarts, sits on a black screen or appears stuck during its first few starts, don’t immediately assume something is broken. Memory initialization and BIOS compatibility are common places to look next.
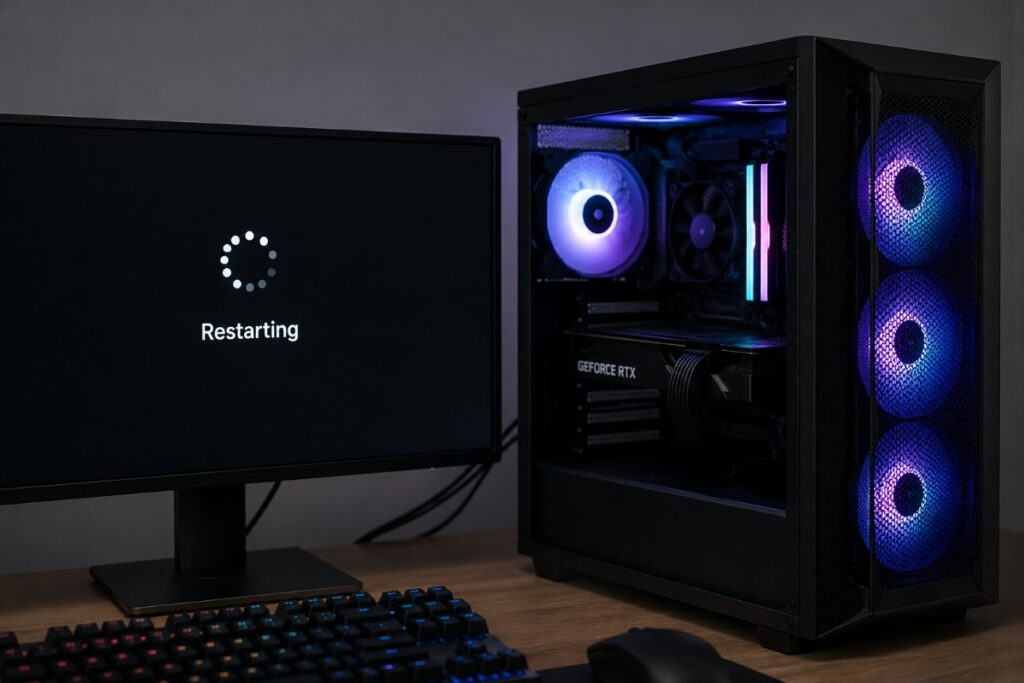
Give DDR5 Memory Training Time
DDR5 systems may perform memory training during the first boot, particularly after building the PC, changing RAM or resetting BIOS settings. During this process the screen may remain black, a DRAM light may stay on and the system may restart.
Give the motherboard time to finish rather than repeatedly switching the PC off after a few seconds. Training time varies by platform, motherboard, memory capacity and configuration, so there is no single correct first-boot time.
If the system eventually reaches BIOS, let it complete the process before changing memory settings.
Remove XMP or EXPO From the Equation
If you already enabled XMP or EXPO and the problems started afterwards, return the memory to its default settings. An unstable memory profile can cause failed POST attempts, restart loops or long training cycles.
Get the PC reliably booting at default memory settings first. You can enable the performance profile and test stability later.
Clear CMOS and Return the BIOS to Defaults
If the PC will not stay running long enough to enter BIOS, clearing CMOS can remove a bad memory setting or other configuration preventing POST.
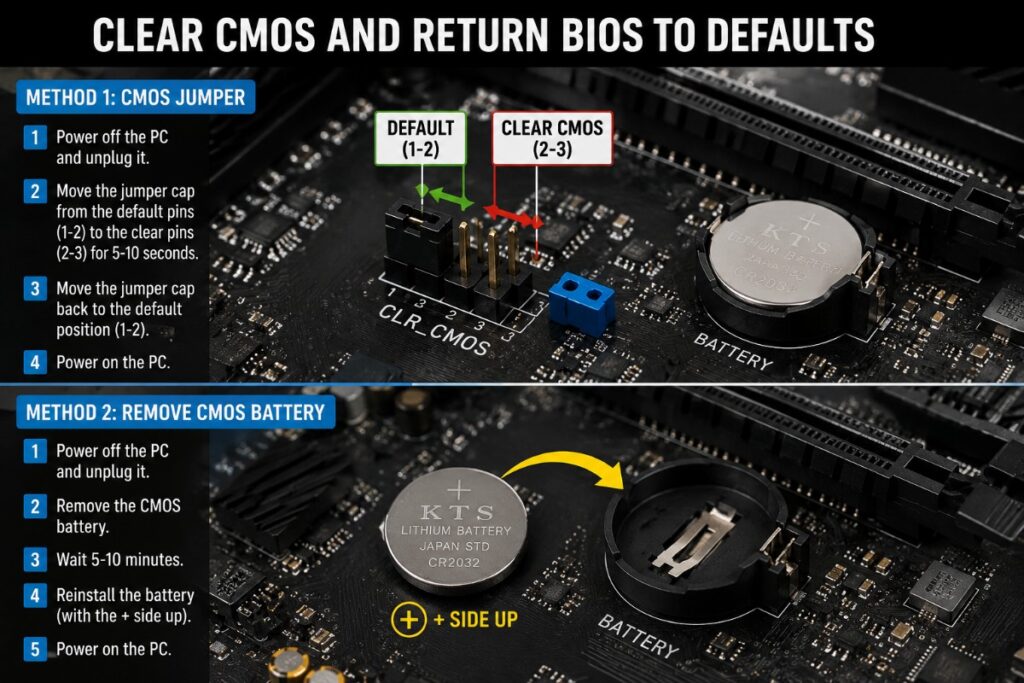
Switch off the PSU, unplug the PC and follow your motherboard manual’s CMOS-reset procedure. Depending on the board, this may use a dedicated button, jumper or CMOS battery method.
After the reset, expect a DDR5 system to perform memory training again.
Try One RAM Stick at Default Settings
If the restart loop continues, return to a single RAM stick in the motherboard’s recommended slot and test at default settings. Try each DIMM individually if necessary.
If one module consistently POSTs while another does not in the same slot and configuration, you have narrowed the problem considerably.
Check Whether the BIOS Supports Your CPU
A compatible CPU socket does not guarantee that the motherboard’s installed BIOS supports your processor. This is especially important when installing a newer CPU generation on a board manufactured before that processor was released.
Look up your exact motherboard model on the manufacturer’s support page and check its CPU support list. It should show the BIOS version required for your processor. If you’re unsure whether updating is the right move, our guide to when a BIOS update is actually worth doing explains the benefits and risks.
Use BIOS Flashback If Your Motherboard Supports It
If the installed BIOS is too old and your motherboard supports BIOS Flashback or an equivalent CPU-less update feature, you may be able to update the BIOS without successfully POSTing first.
Follow the instructions for your exact motherboard. USB formatting, BIOS filenames, ports and button procedures vary between manufacturers and models. Do not assume instructions for another board apply to yours.
If You Can Reach BIOS, Your PC Has POSTed
If you can enter BIOS and the system remains stable there, you have crossed an important line: the PC has successfully POSTed. Stop troubleshooting it like a completely dead build.
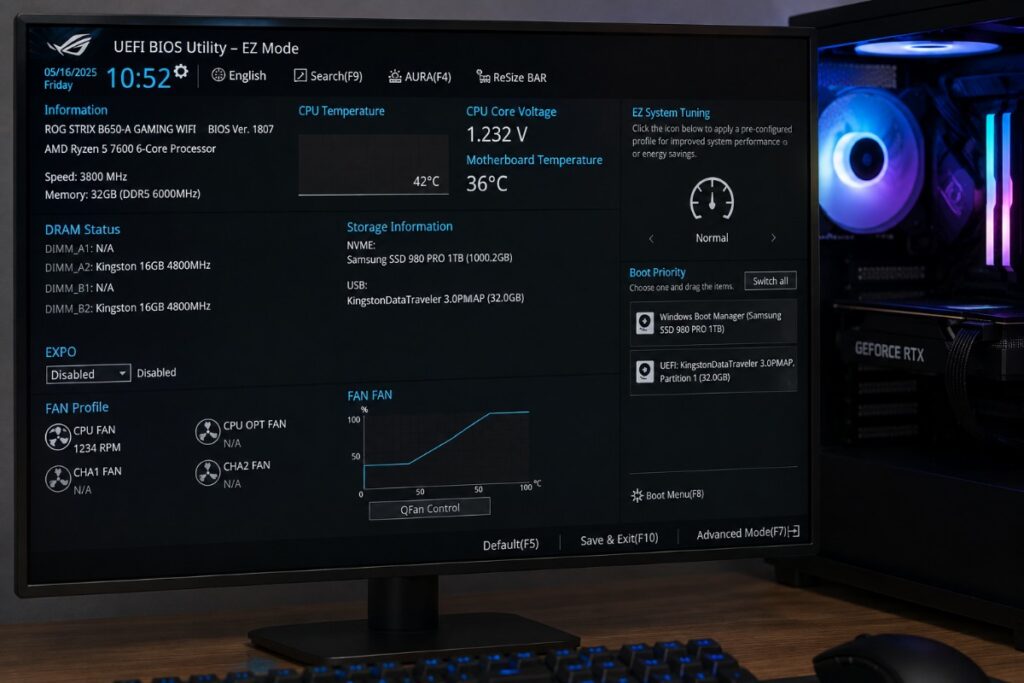
Now the question is why the system cannot find or load an operating system.
Check Whether BIOS Detects Your SSD
Open the BIOS storage or NVMe information and check whether your SSD appears. If the drive is detected, the motherboard can communicate with it and you can move on to the installation media and boot configuration.
Remember that a brand-new blank SSD will not boot by itself. It needs an operating system installed on it. If the SSD itself needs replacing or you’re still choosing storage for the new build, see our guide to the best NVMe SSDs for gaming.
Check Your Windows Installation USB
For a new build without Windows installed, connect a properly created bootable Windows installation USB and restart the PC. If you still need to create one, use Microsoft’s official Windows installation media guide.
If the installer does not appear, use the motherboard’s boot menu to select the USB device. If the USB is not detected at all, try another USB port and confirm that the installation media was created correctly.
Check the Boot Device and Boot Order
If Windows is already installed, check that the correct system drive appears as a boot option. If necessary, select it manually from the boot menu or set the appropriate boot entry first in the BIOS boot order.
Do not randomly change unrelated BIOS settings while troubleshooting a simple boot-device problem.
SSD Installed but Not Detected?
For an NVMe SSD, switch off the PC and reseat the drive. Check your motherboard manual to confirm that the M.2 slot supports your drive type and whether using that slot affects other storage connections.
For a SATA SSD, check both the SATA data cable and PSU power connection, then try another cable or motherboard SATA port if necessary.
If another compatible M.2 slot is available, testing the NVMe drive there can also help isolate a slot or configuration problem.
BIOS Sees the Drive but Windows Won’t Start
If BIOS detects the system drive but Windows still refuses to load, you are no longer dealing with the original no-POST problem. The hardware has progressed far enough to find the storage device, and the next step is operating-system or bootloader troubleshooting.
For a completely new build, install Windows from bootable installation media. If Windows was already installed, troubleshoot the Windows installation rather than going back to randomly reseating the CPU, RAM or GPU.
Still Won’t POST? Strip the PC Down to the Minimum
If the earlier checks have failed, stop testing the full build. The goal now is to remove everything the PC does not need to POST and see whether the core hardware can reach BIOS.
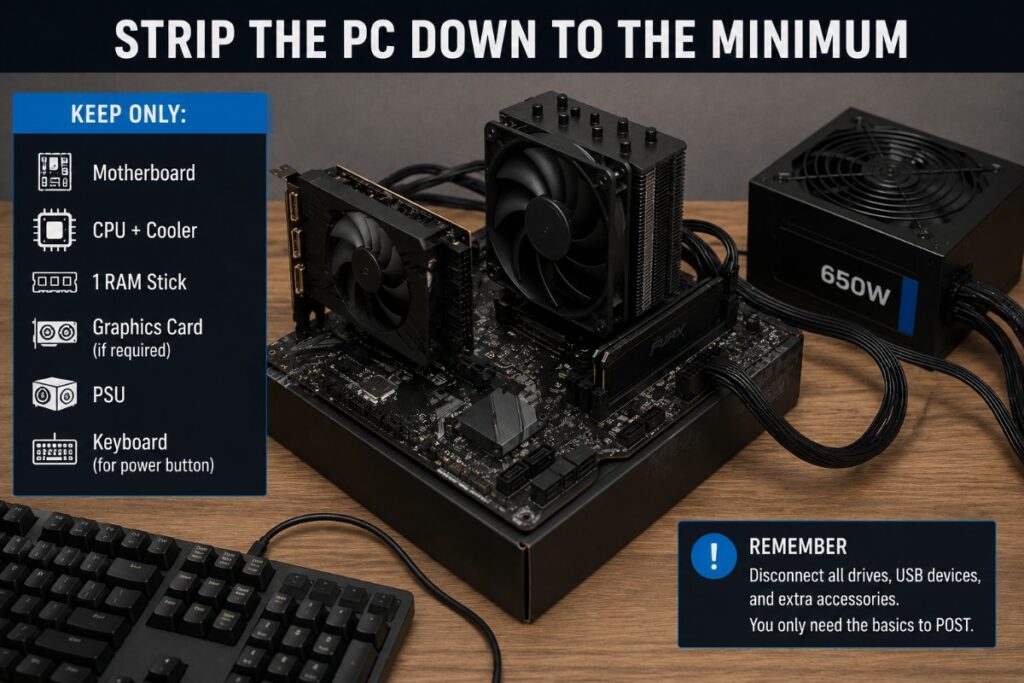
What You Actually Need for a POST Test
For a basic POST test, keep only the motherboard, CPU and cooler, one RAM stick, PSU, and graphics hardware if your CPU cannot provide display output. Connect a monitor and disconnect storage drives, extra USB devices, additional RAM, expansion cards and other unnecessary hardware.
You do not need an SSD or Windows installation to POST and enter BIOS.
Test the System Outside the Case
If the minimum configuration still fails, remove the motherboard from the case and place it on a safe, non-conductive surface such as its motherboard box. Connect only the minimum hardware and start the board using its onboard power button or the correct power-switch pins.
This removes the case, front-panel wiring, misplaced standoffs and other installed hardware from the equation. Do not place the motherboard on an anti-static bag or bare metal surface for this test.
Add Components Back One at a Time
If the PC POSTs in the minimum configuration, reconnect components gradually and test after each meaningful change. Add the remaining RAM, storage drives, expansion hardware and other devices until the failure returns.
The component or connection that causes the problem to reappear gives you a much stronger lead than replacing parts based on guesswork. If the problem eventually points toward incompatible RAM, CPU support or another hardware mismatch.
When Should You Actually Suspect a Faulty Component?
Most first-boot failures do not prove that a component is dead. Suspect faulty hardware only after you have eliminated installation, power, configuration and compatibility problems as far as reasonably possible.
| Component | Evidence That Makes a Fault More Likely |
|---|---|
| PSU | Power connections and case switch are ruled out, and a known-good compatible PSU makes the system work. |
| RAM | One DIMM repeatedly fails while another works in the same known-good slot and configuration. |
| GPU | Another GPU works in the PC, or the suspect GPU also fails in another known-good compatible system. |
| Motherboard | Known-good compatible components still cannot POST and diagnosis repeatedly points back to the board. |
| CPU | Compatibility and installation are confirmed, or controlled cross-testing points to the processor. |
Cross-testing with known-good compatible hardware is one of the best ways to confirm a suspected failure. If you cannot do that, document what you have already tested before contacting the retailer or manufacturer for support or an RMA.
Your PC Finally POSTed, What Should You Do Next?
Once the PC reliably reaches BIOS, resist the urge to immediately enable every performance setting. First establish that the new build works correctly at its default configuration.
Confirm that the CPU, RAM and storage are detected correctly, then install the operating system and required drivers. Once Windows is running, work through our complete gaming PC health check to catch temperature, stability or configuration problems before they become harder to diagnose.

If you haven’t used it before, our MSI Afterburner guide explains how to set it up and monitor your new PC while gaming.
Then use our gaming PC performance testing guide to make sure the new build performs as it should under real load.
New PC Won’t Boot: Frequently Asked Questions
Why Does My New PC Turn On but Show No Display?
The PC may have power without successfully completing POST. Check the monitor and display cable first, then the correct GPU or motherboard output, GPU power and seating, RAM seating and motherboard debug LEDs.
Can RAM Cause a PC to Turn On but Not Boot?
Yes. Incorrectly seated, unstable or faulty RAM can prevent POST even while fans and RGB are running. Try one RAM stick in the motherboard’s recommended slot at default memory settings before assuming the RAM is faulty.
How Long Should a New PC Take to POST for the First Time?
There is no universal first-POST time. DDR5 systems can take longer while the motherboard performs memory training, and the screen may remain black or the system may restart during the process. Give a new DDR5 build time to complete training before repeatedly powering it off.
Does a PC Need an SSD to POST?
No. A PC can complete POST and enter BIOS without an SSD or operating system. Storage becomes necessary when you want to install or load the operating system.
Can a PC Enter BIOS Without Windows Installed?
Yes. BIOS runs independently of Windows. Reaching BIOS on a new build is actually an important milestone because it confirms that the system has successfully completed POST.
Does a BOOT Debug Light Mean My Motherboard Is Broken?
Usually not. A BOOT light generally means the motherboard has reached the boot-device stage but cannot find or use a suitable boot device. Check whether BIOS detects your SSD and whether an operating system or bootable installation USB is available. Always confirm the exact LED behaviour in your motherboard manual.
Don’t Replace Parts Until You’ve Isolated the Problem
A new PC that will not boot can make an expensive component look dead when the real problem is a loose cable, incorrectly seated RAM, an unsupported BIOS version or something as simple as the wrong display output.
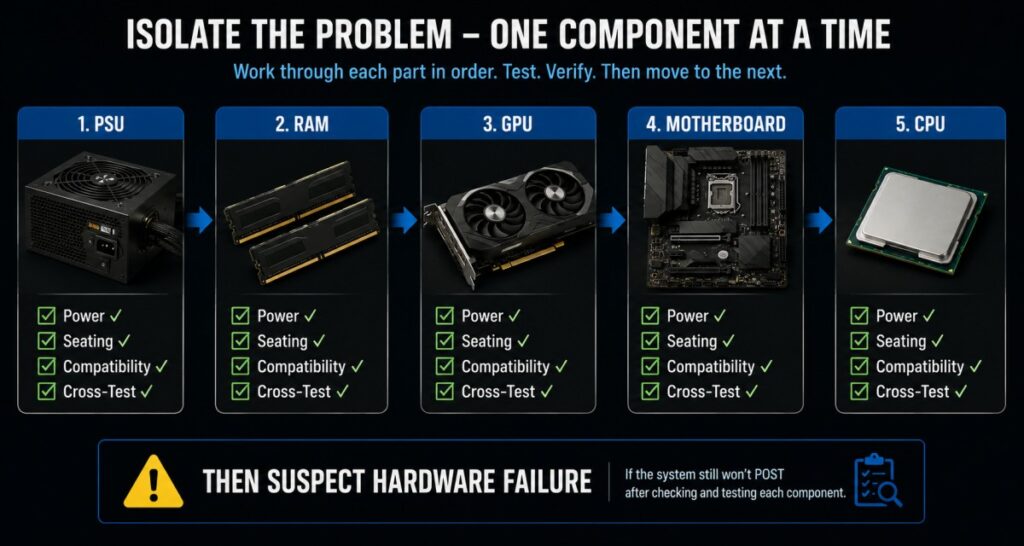
Start with what the PC actually does when you press power, follow the matching troubleshooting path and change one thing at a time. If you eventually reach the minimum-hardware test, you are no longer guessing — you are isolating the fault.
Once the PC reaches BIOS reliably, the first-boot problem is solved. From there, you can install the operating system, test the new build properly and finally start using the PC you built.