
Should you cap your FPS or leave it uncapped? Neither is automatically better. An FPS cap can reduce unnecessary GPU workload and help deliver more consistent frame times when your PC can sustain the target. Uncapped FPS can give you lower input latency in some competitive setups, although it may also increase power use, heat, and visible tearing.
If you’re gaming on an older or weaker PC, don’t start by copying someone else’s 144 Hz or 240 Hz settings. Start with what your hardware can reliably deliver, then test whether a cap makes the game feel better.
| Your priority | Best starting point |
|---|---|
| Less stutter on a weak PC | Test a cap your PC can sustain; don’t assume it will fix every spike. |
| G-SYNC or FreeSync without hitting the top of its range | Test a cap a little below maximum refresh, unless your game or latency system already manages it. |
| Lowest possible latency in a competitive game | Compare uncapped FPS against a higher or VRR-friendly cap. |
| Lower GPU heat, power use, or fan noise | Try a lower cap that still feels responsive. |
| Steadier single-player gameplay | Prioritise a frame rate the PC holds consistently. |
Capped vs Uncapped FPS: What Actually Changes?
Capped FPS means setting a maximum frame rate, such as 60, 90, or 141 FPS. Uncapped FPS lets the game render as fast as the system and game engine allow. A cap limits how many frames the game attempts to produce; it doesn’t make a slow GPU faster.
| What changes? | Capped FPS | Uncapped FPS |
|---|---|---|
| Frame-rate ceiling | Has a chosen upper limit | Runs up to the system or game’s limits |
| Input latency | Can improve or worsen it depending on the limiter, GPU load and sync settings | Can be lower in latency-focused configurations |
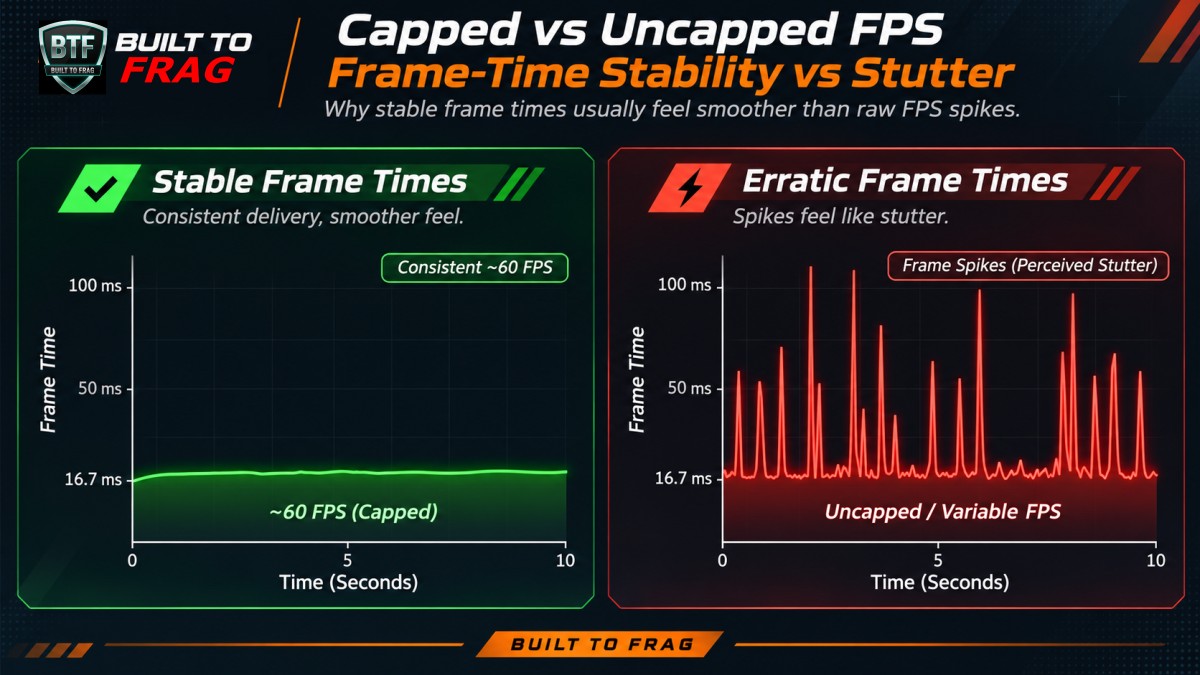
| Frame-time consistency | May improve if the cap and limiter suit the system | Can vary as workload changes |
| GPU power and noise | Often lower when the cap meaningfully reduces GPU work | May be higher if the GPU renders extra frames |
| Screen tearing | A cap alone does not guarantee tear-free output | Tearing may be visible without suitable sync |
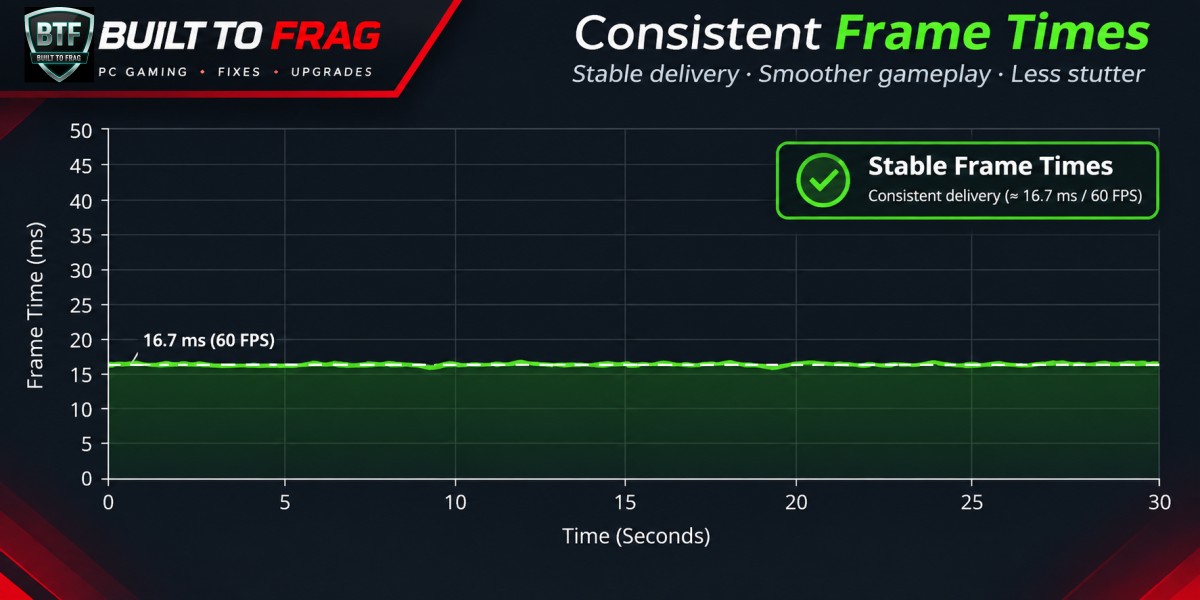
Two numbers matter here: FPS is the number of frames rendered each second; frame time is how long each frame takes to produce. At 60 FPS, one frame takes about 16.7 milliseconds; at 120 FPS, about 8.3 milliseconds. A good average can still hide occasional long frames that feel like a hitch or pause.
And no, a monitor showing 144 refreshes per second doesn’t make frames rendered above 144 FPS completely useless. Extra frames can still affect how recently the game’s input was sampled and which portion of a frame appears on screen. That’s part of why some competitive players accept tearing in exchange for lower latency. NVIDIA explains the distinction in its system latency guide.
When Capping FPS Makes Sense
An FPS cap makes sense when you’re solving a specific problem, not just because a settings guide says to switch it on.
Your older PC cannot hold a steady frame rate
Imagine a game that usually runs between 40 and 65 FPS. Testing a 40 FPS cap could make frame delivery more predictable during the lighter parts of a scene. But if the game still falls into the low 30s when effects appear, the cap won’t prevent those drops. Lowering demanding graphics settings or diagnosing the bottleneck may help more.
That distinction matters more than chasing a high FPS counter. Our guide to what smooth gameplay feels like on a low-end PC explains why consistent frame delivery deserves attention.
Your GPU is doing unnecessary work
Lightweight games and menus can push very high frame rates even when you don’t need them. A sensible cap can reduce GPU workload, power draw, temperature and fan noise. That’s especially helpful in a compact desktop or gaming laptop, although the savings depend on the game and how heavily the GPU was working before the cap. AMD documents these benefits in its Frame Rate Target Control guidance.
You want predictable frame delivery with variable refresh
With G-SYNC or FreeSync, a suitable cap can help keep the game below your display’s maximum variable-refresh rate. The aim here is to avoid repeatedly reaching the top of the VRR range, not to make the GPU render frames it couldn’t manage before.
When Leaving FPS Uncapped May Be Better
If you’re playing a fast competitive game and minimum input latency is your main priority, uncapped FPS deserves a fair test. In some configurations, the next displayed update can reflect more recent input even when the FPS counter is far above the monitor’s refresh rate.
There are trade-offs. With V-SYNC off, you may see tearing; the GPU may use more power; and the experience can become inconsistent if performance swings sharply. On the other hand, an unnecessarily restrictive cap or poorly suited limiter can make controls feel less responsive. NVIDIA notes that a G-SYNC, V-SYNC and Reflex configuration designed to avoid tearing may have slightly higher latency than leaving FPS uncapped with Reflex enabled.
Practical decision: If you’re comfortable with some tearing and care more about fast response than quiet operation, test uncapped. If tearing and consistency bother you more, test VRR with an appropriate cap. Don’t assume a single configuration wins for every game.
What FPS Should You Cap At?
First decide why you’re capping. A cap for G-SYNC or FreeSync solves a different problem from a cap intended to stabilise an underpowered PC.
For G-SYNC or FreeSync: start below the maximum refresh rate
If your game regularly reaches the top of the display’s VRR range and you need a manual limiter, the following values are reasonable starting points. They are not mandatory settings or guarantees: limiter overshoot, actual display refresh rate and automatic Reflex behaviour can change what works.
| Monitor refresh | Manual cap to test |
|---|---|
| 60 Hz | 57 FPS |
| 75 Hz | 72 FPS |
| 120 Hz | 117 FPS |
| 144 Hz | 141 FPS |
| 165 Hz | 162 FPS |
| 180 Hz | 177 FPS |
| 240 Hz | 237 FPS |
These examples follow the commonly used few-FPS-below-refresh approach discussed in Blur Busters’ G-SYNC analysis. At very high refresh rates, a fixed three-FPS gap provides less time-based headroom, so you may need to adjust it after testing. Some games using Reflex and compatible sync settings can manage their own cap. Check that before stacking another limiter on top.
For an older PC: choose a number the hardware can actually sustain
Don’t cap at 141 FPS merely because you have a 144 Hz monitor if your PC normally produces 45 FPS. Watch a demanding section of the game first. If it hovers around 40–65 FPS, compare uncapped play with a 40 FPS cap. If it holds roughly 60 FPS but frequently dips below that, a 50 or 45 FPS cap might be worth testing, if the game permits it.
These are examples to test, not measured recommendations. A cap below the performance you can sustain may help frame delivery feel more regular, but it also lowers your maximum displayed frame rate. If the game feels worse, undo it.
What about frame generation? Don’t automatically apply the same cap you used with ordinary rendering. Frame-generation systems and latency controls can interact with the limiter. Follow the game’s and feature provider’s recommendations, then check the result. Generated frame counts do not, by themselves, prove lower input latency or better underlying game performance.
How to Cap FPS Without Complicating Your Setup
Use one known limiter to establish a baseline. Don’t enable multiple caps at once and then try to guess which setting is responsible for the result.
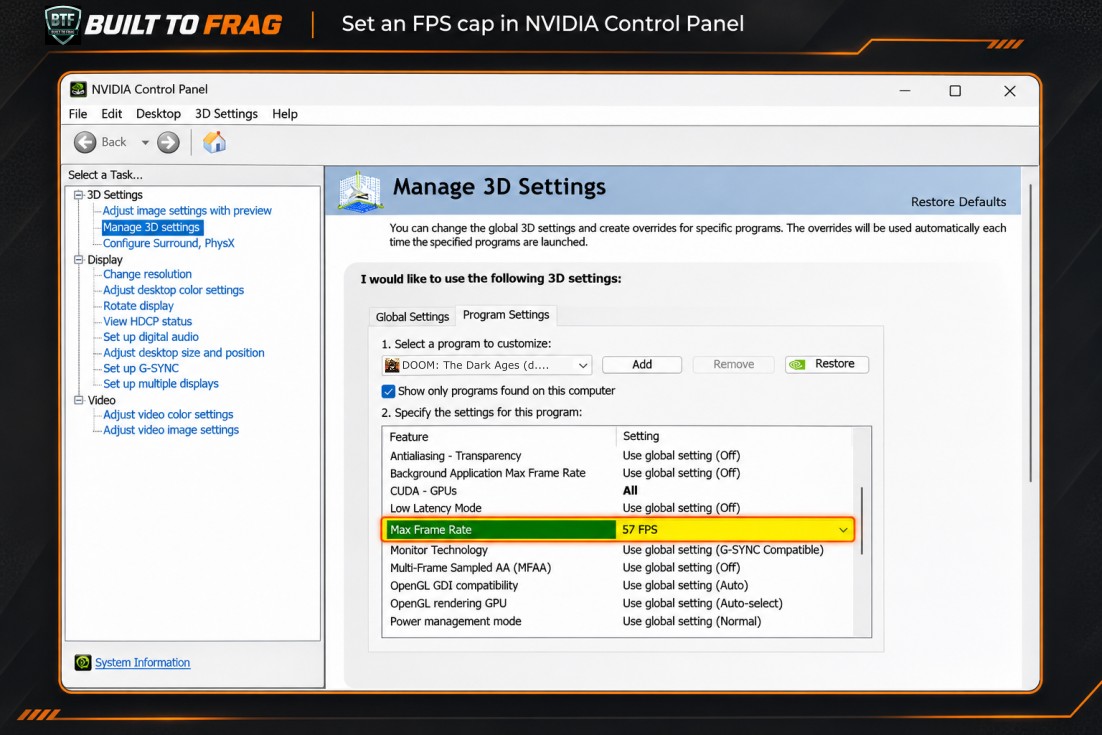
- Try the game’s built-in FPS limiter first. Look in Video, Graphics or Display settings for Max FPS, Frame Rate Limit or a similar option. Record the original value so you can restore it.
- Use a driver limit if the game lacks a useful control. Driver options vary by GPU, driver version and game API; apply the setting to the game profile where possible.
- Use a third-party limiter only when necessary. RTSS is an option for games without a reliable built-in or driver cap. Confirm compatibility with the game’s anti-cheat and overlay restrictions.
- Recheck in-game behaviour. Confirm the FPS settles near your selected target and that no other setting is overriding it. If the controls feel delayed or the pacing is worse, revert the change.
Where to find the limit on NVIDIA, AMD and Intel
NVIDIA: Open NVIDIA Control Panel, go to Manage 3D settings, and look for Max Frame Rate. You can use a program-specific profile. If the game supports NVIDIA Reflex, check how it interacts with the limiter before forcing a separate cap. See NVIDIA’s Max Frame Rate instructions.
AMD: Open AMD Software: Adrenalin Edition and inspect the game’s graphics profile. Radeon Chill dynamically changes its frame-rate limits with activity; it isn’t the same as a simple fixed cap. Frame Rate Target Control, where supported, is another option. Feature availability varies, and enabling Chill can disable Anti-Lag or Boost in configurations documented by AMD. See AMD’s Radeon Chill guidance.
Intel Arc: Don’t assume that every Intel graphics software version provides the same game-specific FPS limiter. Check your installed graphics application and the game’s settings first. If neither offers a supported limit, consider a compatible external tool instead.
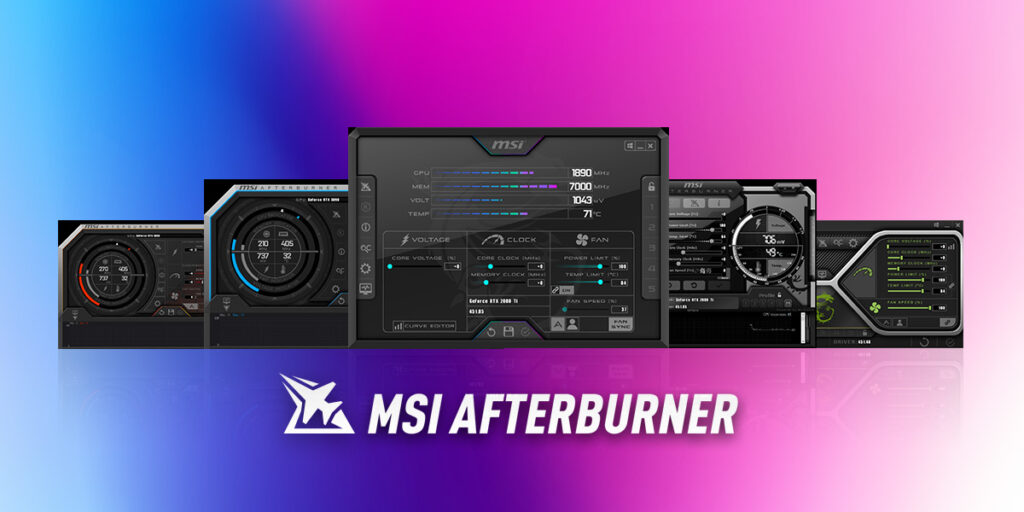
If you’re unfamiliar with the monitoring overlay, our MSI Afterburner setup guide explains the controls. MSI Afterburner monitors performance; the RTSS component can provide the external frame-rate limiter.
How to Test Capped vs Uncapped FPS on Your Own PC
You don’t need to trust somebody else’s GPU results. A short, repeatable comparison can show whether capping helps your game. This is a testing procedure, not a claim that Built To Frag has already measured a performance improvement.
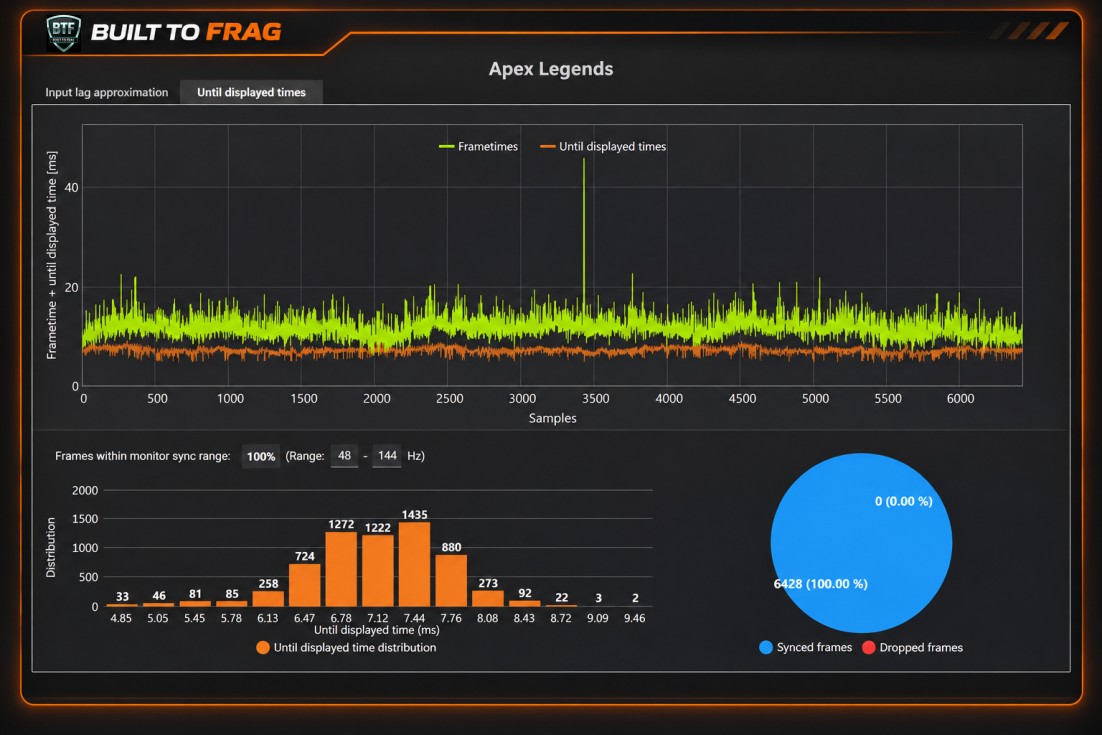
- Pick a repeatable scene. Use a built-in benchmark or the same route through an area of the game. Keep resolution, graphics settings, sync settings and background programs unchanged.
- Warm up the game. Let initial loading and obvious shader-compilation activity settle so your comparison isn’t dominated by a one-off startup hitch.
- Test uncapped first. Capture three comparable runs using a tool such as CapFrameX, and note the frame-time pattern, average FPS, 1% lows and any obvious stutter.
- Choose one cap and repeat. Test either a sustainable value for your PC or a VRR-friendly value for your monitor. Run the same scene three more times.
- Compare the trade-offs. Look for fewer large frame-time spikes, more consistent delivery, acceptable responsiveness and any meaningful change in GPU power or temperature if you can monitor those readings reliably.
- Keep the setting that actually helps. If there’s no measurable or noticeable benefit, restore your original limiter setting. If the cap makes the game less responsive, don’t keep it merely because a chart looks tidy.
Important: A frame-time graph and a 1% low result don’t directly measure end-to-end input latency. To make a proper latency claim, you need suitable latency-measurement equipment or a supported measurement feature. For a fuller walkthrough of benchmarks and monitoring, see how to test gaming PC performance.
What If Capping FPS Doesn’t Fix the Stutter?
An FPS cap can limit how quickly new frames are requested; it cannot repair every reason a frame takes too long. If your PC still stutters, use what happens during the drop to decide where to look next.
- FPS keeps dropping below the cap: The hardware or game may not be able to sustain that target in demanding scenes. Check graphics settings and CPU/GPU load.
- Stutter happens when entering new areas: Asset streaming or shader compilation may be contributing. A frame-rate limit won’t necessarily remove those hitches.
- Performance worsens during long sessions: Check temperature, clock speed and power-limit readings for evidence of throttling instead of assuming the cap is wrong.
- The FPS graph looks stable but controls feel delayed: Recheck V-SYNC, VRR, Reflex or other latency settings, and whether more than one limiter is active.
If those checks point beyond the limiter, follow our guide to fixing stutter even on low settings. Don’t buy a GPU or add RAM until you’ve identified a real limitation.
The bottom line: Cap FPS when you have a reason—more consistent frame delivery, staying within a VRR range, or less heat and noise. Leave it uncapped when responsiveness matters more and your own testing supports that choice. The best setting is the one that behaves better on your PC, not the one that looks best in someone else’s FPS screenshot.
The −3 isn’t magic, it’s just a frametime cushion, and that cushion shrinks as Hz climbs. At 144Hz your 141 cap is worth about 0.15ms of margin — by 480Hz (477) that’s down to about 0.013ms, and by 540Hz it’s basically nothing, about 85x thinner than at 60Hz. Table also skips in-between panels like 239.76Hz, which are real refresh modes, not typos.
Thanks for the thoughtful correction. You’re absolutely right that a fixed three-FPS reduction creates a progressively smaller frame-time margin as refresh rates increase.
We’ve updated the article to clarify that 2–3 FPS below the refresh rate is a practical starting point, not a universal rule. We also added guidance for very high-refresh and fractional-refresh displays, plus a clearer explanation of what LFC does at the lower end of the VRR range.
I appreciate you taking the time to provide the calculations, it helped us make the guide more accurate.