Remember those choppy 30 FPS boss fights that felt like playing underwater, then you finally upgrade and hit buttery 144 FPS. That jump is magic when you do it right, it is pain when you do it wrong.
Promise: This is your no-BS checklist to upgrade a GPU the right way. By GPU we mean a dedicated graphics card, not integrated graphics. We will cover smart prep, compatibility, clean install habits, and quick safety steps that keep your rig alive.
Overview: We will walk through seven common gpu upgrade mistakes and show you the fix for each one so you can upgrade safely and get the performance you paid for. In some cases, stutters and slowdowns come from memory limits, not graphics power, this explains when a RAM upgrade matters more than a GPU upgrade. One of the easiest GPU upgrade mistakes is buying based on VRAM alone, which is exactly why our RX 9060 XT 16GB review breaks down where big specs can still mislead you.
Mistake 1: Skipping Benchmarks Before You Buy
Why it matters: If you do not measure, you guess. Benchmarks reveal whether your performance problem is really the GPU, or if settings, storage, or a specific game engine is the issue.
What to do: Run a baseline with 3DMark and a free stress test like Unigine Heaven. Check in-game overlays for average FPS, 1% lows, and frame time stability. Note temps and clocks. Compare across a few titles from your library. If you focus on shooters, try something from your list of favorites here: Best FPS Games for PC 2025.
Watch for: Stuttering, crashes under load, big dips in 1% lows, or the inability to hold your target settings. If the upgrade is mainly for ray tracing, sanity check whether you actually use those effects in real play, start here for a reality check: Ray Tracing Isn’t Magic, Just Expensive Lighting.
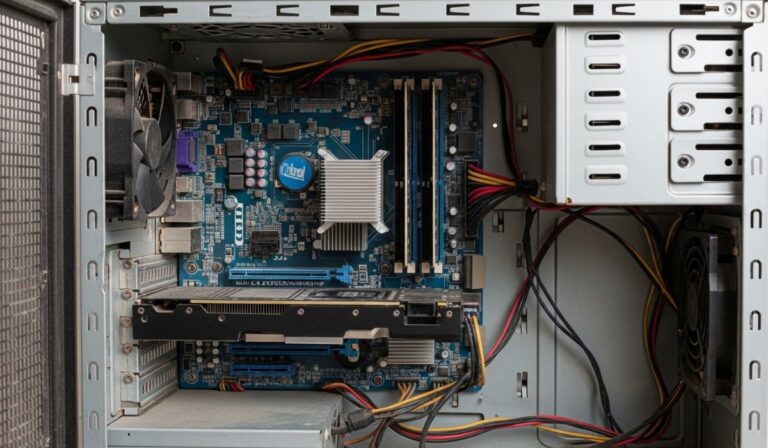
Mistake 2: Ignoring Compatibility Checks
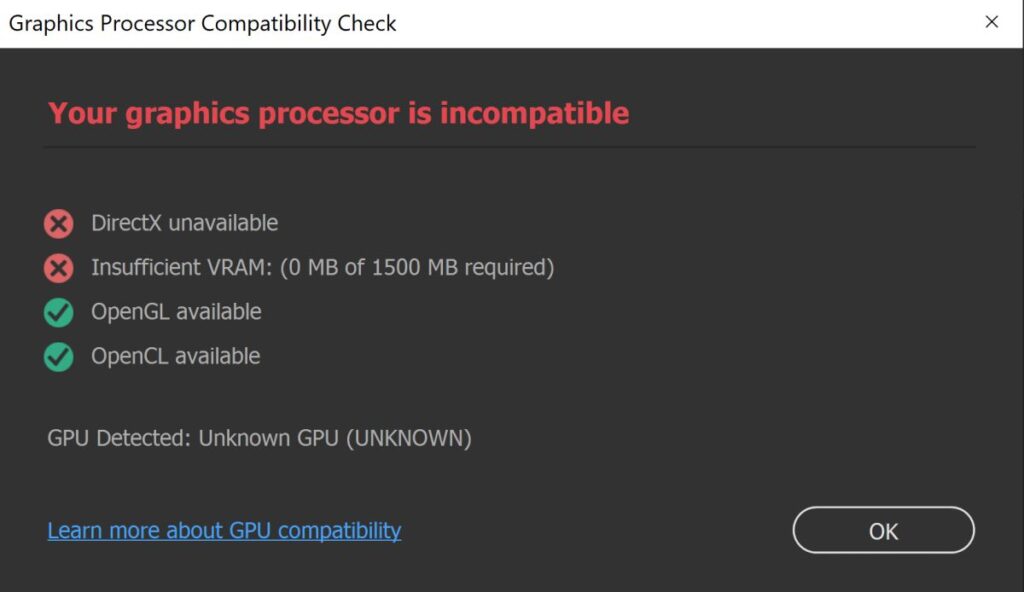
Why it matters: A powerful GPU is useless if it will not fit, will not talk to your board, or gets strangled by your CPU.
- Motherboard and PCIe: Confirm you have a full-length PCIe x16 slot and enough physical space around it. PCIe 4.0 and 5.0 cards work in older slots, performance impact is usually small for gaming, but check your board manual.
- CPU bottlenecks: If your CPU is old or low core count, it can limit the new card. Check per-game CPU usage during your baseline runs. If one or two cores are pinned while the GPU loafs, the CPU is the gate.
- Case clearance and airflow: Measure card length, height, and thickness. Some triple-fan models eat four slots. Make sure front intake and side panel have breathing room.
Helpful: If you are planning broader upgrades, use this to map parts that actually fit together: How to Pick PC Parts That Fit and Perform.
Mistake 3: Underestimating the PSU
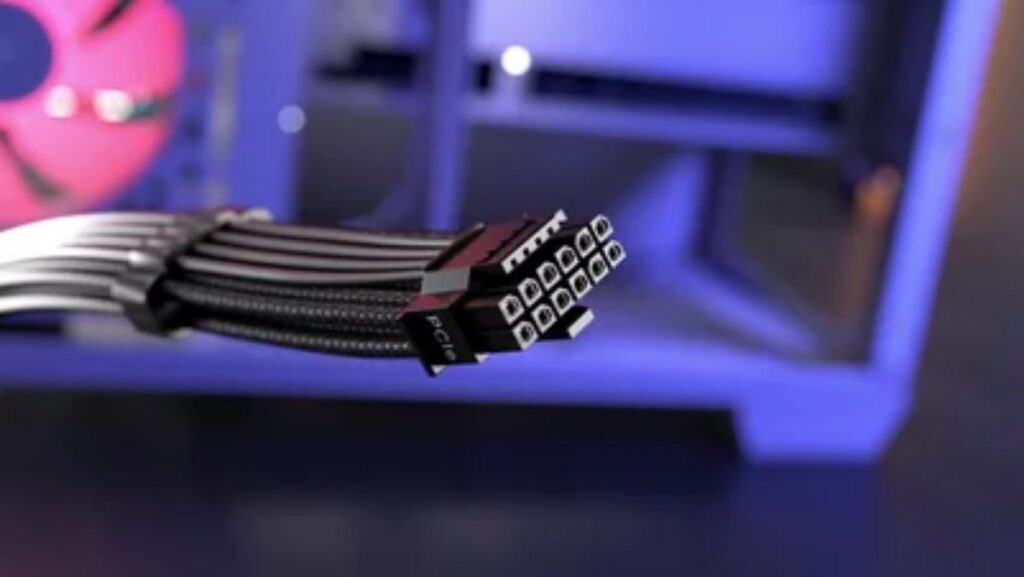
Why it matters: Many crashes, random restarts, and black screens come from weak power supplies or missing PCIe power leads.
- Wattage: Check the manufacturer’s recommended PSU wattage for your exact GPU model. Add headroom for transient spikes.
- Cables: Count the required 6-pin, 8-pin, or 12VHPWR connections, use separate cables when possible, avoid daisy-chain drama.
- When to upgrade: If your PSU is old, low tier, or undersized, replace it before the GPU goes in. Stability first, frames later.
Related build example: See our starter parts logic here: Best Ultra-Budget Gaming PC Build 2025.
Mistake 4: Skipping Basic Safety and Prep
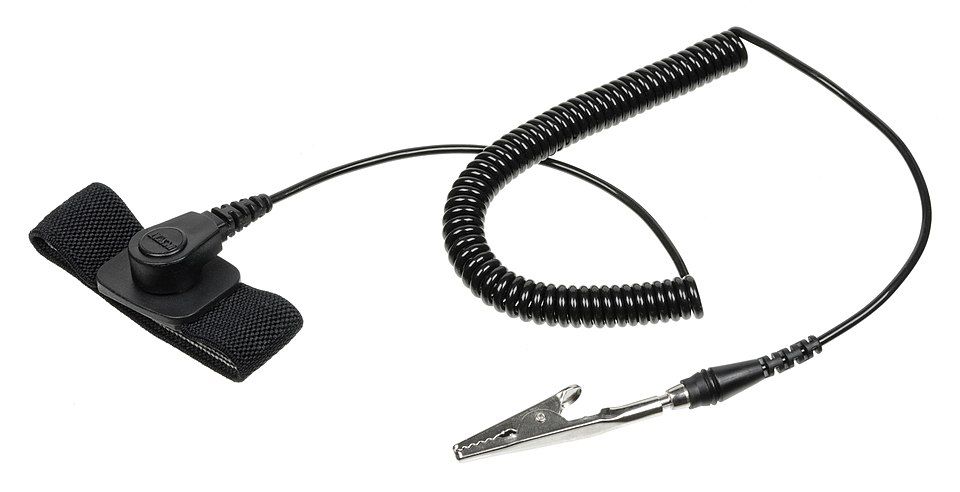
Why it matters: Static discharge and messy cables turn a fun upgrade into a parts order.
- Power down, unplug, discharge: Shut down, switch off the PSU, unplug the cable, press the case power button once to discharge.
- Ground yourself: Touch the metal chassis regularly or use an anti-static wrist strap. Static electricity can damage components in an instant.
- Clear workspace: Good lighting, screws in a cup, cables out of the way. Less chaos, fewer mistakes.
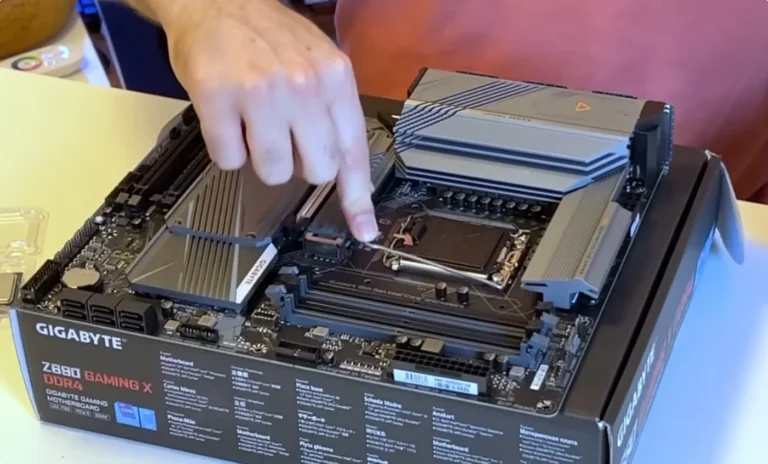
Mistake 5: Rushing the Physical Install
Remove the old card: Unplug PCIe power. Unscrew the bracket. Press the PCIe slot latch and lift the card straight out.
Seat the new card: Align with the slot, press down firmly until the latch clicks, then secure with screws. Connect the correct power leads. Check that the card is level and not sagging. If your case supports a support bracket, use it. To avoid costly upgrade mistakes with a clearer big picture, read our Next-Gen GPU Performance Hub.
Final pass: Route cables so fans are clear. Close the panel, reconnect power, and boot.
Mistake 6: Making a Mess of Drivers and Settings
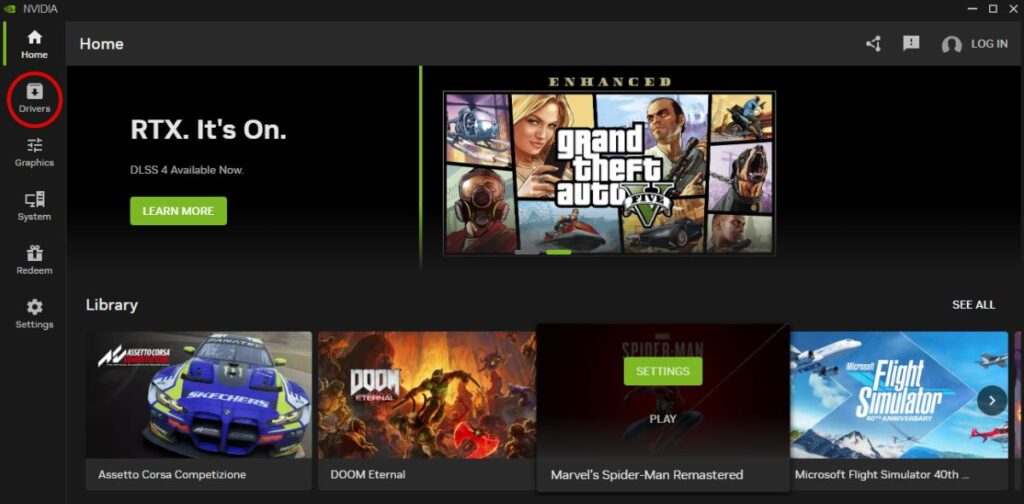
Clean install mindset: Uninstall old GPU drivers first. Then grab fresh drivers from the official pages, NVIDIA or AMD. During install, pick the clean or factory option where available.
- After install, set your monitor’s correct refresh rate in Windows display settings.
- Set native resolution, confirm HDR or VRR if your display supports it.
- Optional tools: capture overlay, GeForce Experience or Adrenalin features, only enable what you use.
Mistake 7: Not Stress Testing or Monitoring Afterward
Prove stability: Run a loop of 3DMark or a long pass in Unigine Heaven. Play your heaviest game for at least 20 to 30 minutes. Watch temps, clocks, and GPU utilization.
Tune if needed: Adjust fan curves, check power limits, and verify case airflow. If you still see hitching or weird drops, start here for practical fixes that are not snake oil: Why Does My Game Stutter on High-End PC?
If you are tuning performance and something keeps crashing under load, this GPU troubleshooting guide helps you verify stability before you chase more FPS.
Quick Summary Table
| Mistake | Quick Fix |
|---|---|
| Skipping benchmarks | Baseline with 3DMark and Unigine, log FPS, temps, 1% lows |
| Ignoring compatibility | Check PCIe slot, CPU bottleneck, case clearance, board manual |
| Underpowered PSU | Verify wattage and connectors, add headroom, upgrade if needed |
| No safety or prep | Unplug, discharge, ground yourself, tidy the workspace |
| Rushing install | Release latch, seat firmly, screw down, correct cables, check sag |
| Driver mess | Uninstall old, clean install official drivers, set refresh rate |
| No stress test | Loop a benchmark, play your heaviest game, monitor temps and clocks |
BTF’s Conclusion!
Upgrading your graphics card should feel like unlocking a new game, not like defusing a bomb. Follow this checklist, avoid the classic gpu upgrade mistakes, and you will land on smoother frames, cleaner visuals, and a rig that boots every time.
Bookmark this guide for your next upgrade, and keep exploring parts that actually fit and perform here: How to Pick PC Parts That Fit and Perform.
Resources
- NVIDIA Drivers
- AMD Drivers
- 3DMark Benchmark
- Unigine Heaven Benchmark
- TechRadar GPU Installation Guides