This guide walks you through how to test gaming pc performance safely, using benchmarks, temps, and FPS checks that actually tell you something. No mystery graphs, no “trust me bro” advice. You will measure first, interpret results second, and only then decide what to fix or upgrade.
What Testing Gaming PC Performance Actually Measures
Most people think performance testing is “run a benchmark, get a score, feel something.” In reality, you are checking a few very specific things:
- FPS: How many frames you get on average.
- Frametime consistency: Whether frames arrive smoothly, or in ugly spikes (that “micro-stutter” feeling).
- Temperatures: CPU and GPU temps under load, not just at idle.
- Throttling: When your CPU or GPU slows down to protect itself from heat or power limits.
- Stability: Crashes, driver resets, black screens, sudden reboots.
- Load behavior: Is the game CPU-bound, GPU-bound, RAM-hungry, or streaming-heavy on storage.
If you want deeper monitoring skills beyond this article, read How to Monitor Temps, Clocks & Usage Like a Pro. This post is the “measure it correctly” foundation.
Before You Test: Safe Setup Checklist
This is how you avoid turning “testing” into “why is my PC making a new sound.” Do this first, every time:
- Update GPU drivers (clean installs only when needed, no panic installs every week).
- Close background hogs (Chrome, launchers, RGB apps, 14 tabs of “is 92°C normal”).
- Plug in properly (laptop on AC power, desktop on a stable outlet, no sketchy multi-plug chaos).
- Turn on monitoring before you start testing (temps, clocks, usage, FPS).
- Make airflow real (remove the dust blanket, make sure fans spin, side panel on is usually better for airflow).
- Pick a consistent test scenario (same game area, same settings, same resolution, repeatable route).
If temps or throttling are already suspicious, read Your Temps Are Lying, The Hidden Throttles Killing FPS before you assume your hardware is “weak.”
Best Tools for How to Test Gaming PC Performance
You do not need to spend money to get reliable performance data. You need the right mix of tools, and a repeatable workflow.
GPU Benchmarks
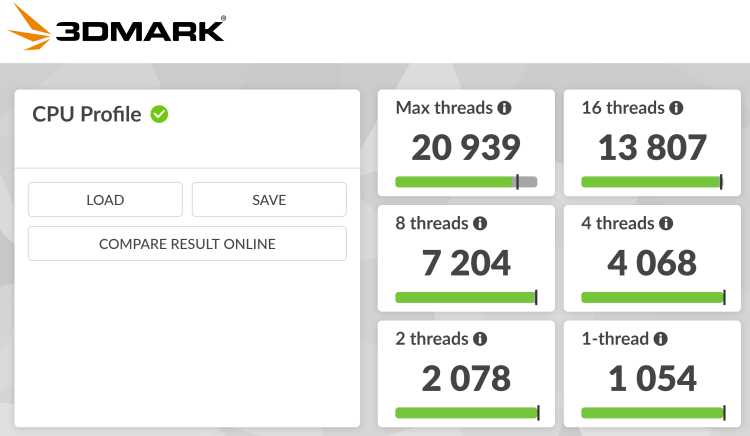
- 3DMark (Time Spy, Fire Strike): Great for repeatable GPU comparisons. Official page
- Unigine Heaven or Valley: Older, still useful for stability and thermal behavior.
CPU Benchmarks
- Cinebench (R23 style testing): Solid for CPU scoring and thermal behavior. Official page
- CPU-Z: Lightweight snapshot of CPU behavior, clocks, and quick tests.
Take Note: If you’re benchmarking to decide on an upgrade, Buying a Used CPU for Gaming explains what to test so you don’t “upgrade” into the same problem. Before testing performance, make sure you understand what “good” actually looks like. This guide breaks it down clearly: normal CPU and GPU usage in games.
Stress Tests
- OCCT: Practical “find the weak link” testing across CPU and GPU. Official page
- Prime95: Brutal CPU load. Useful, but easy to overdo.
- FurMark: GPU torture test. Use carefully and do not treat it like normal gaming.
Real-Time Monitoring
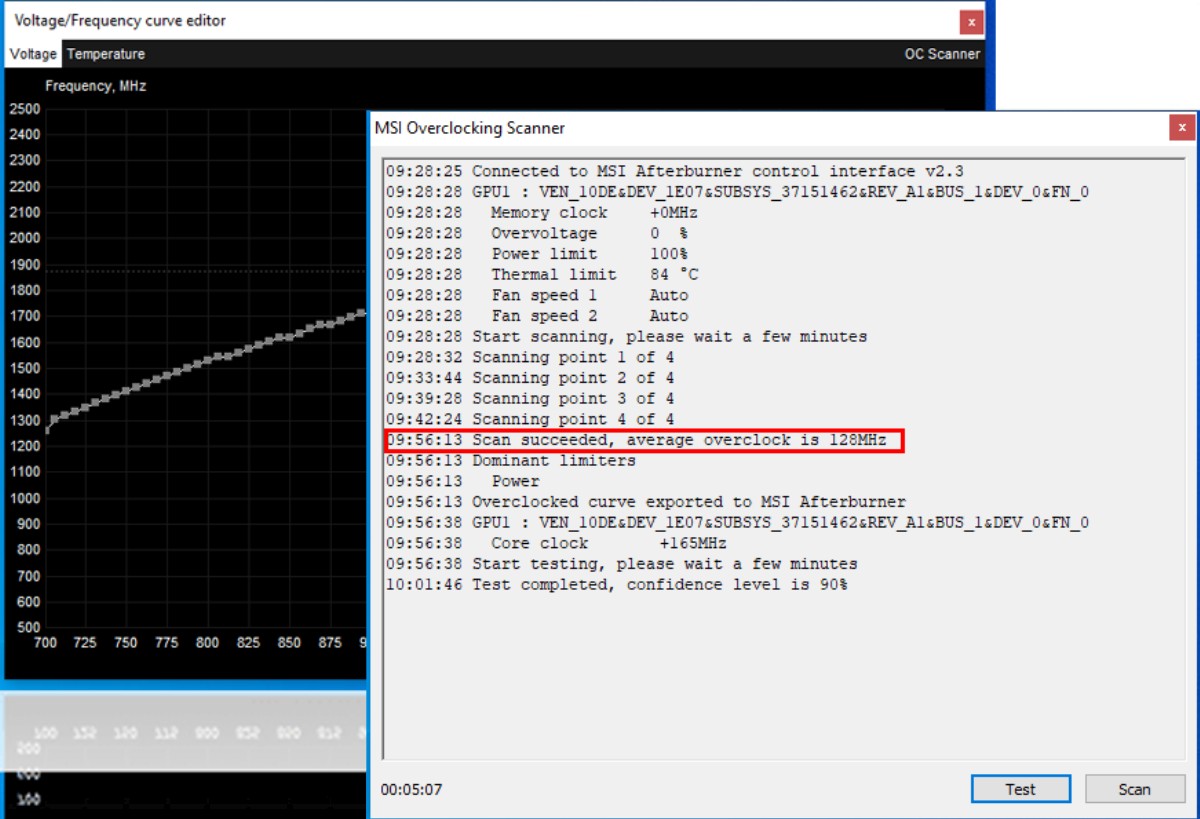
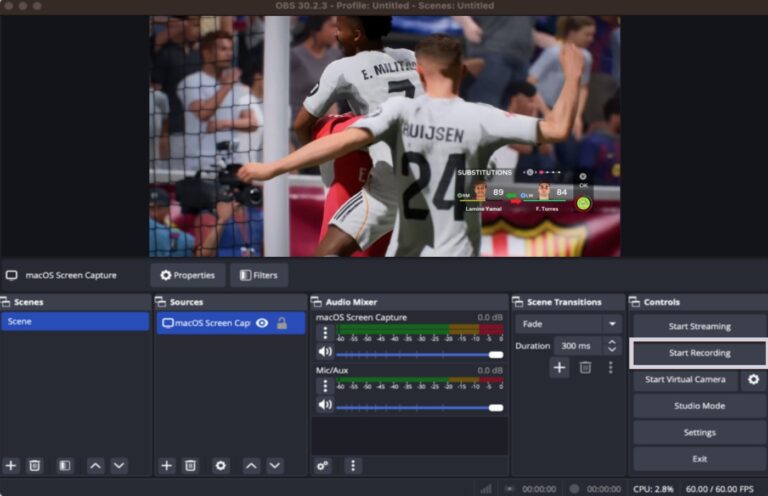
- MSI Afterburner: FPS, temps, usage, clocks, and an on-screen display.
- HWiNFO or HWMonitor: Deep sensor data, voltages, hotspots, and the stuff that explains “why.”
Need a safe setup for overlays and monitoring? Use How to Use MSI Afterburner Safely and stop guessing.
How to Test GPU Performance Step by Step
This is the clean GPU workflow. Repeatable, safe, and actually useful.
- Set a baseline: write down your resolution, graphics preset, and whether upscaling is on.
- Warm up the system: run a game or a light benchmark for 5 minutes so temps stabilize.
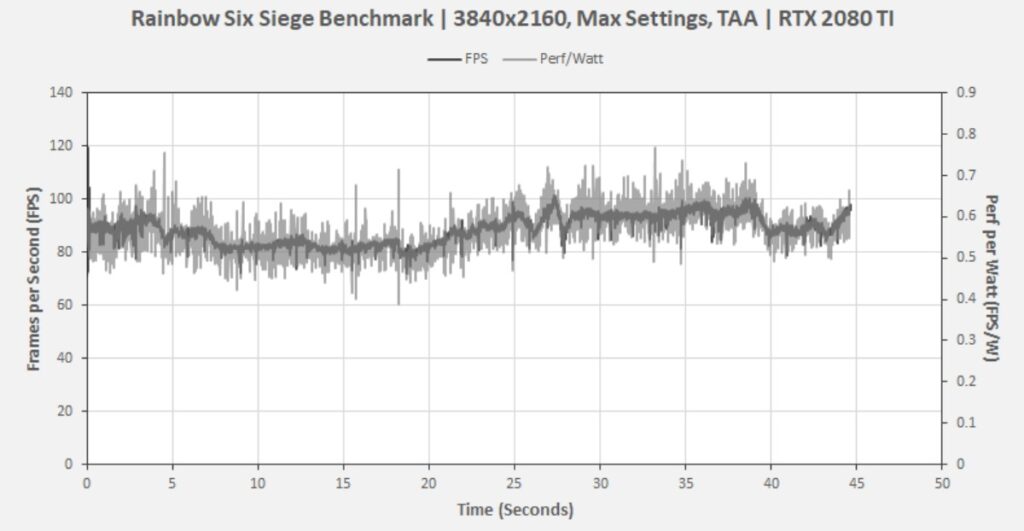
- Run a benchmark: 3DMark Time Spy is a good default, or a consistent in-game benchmark if the game has one.
- Record these numbers: average FPS, GPU temp, GPU hotspot temp (if available), GPU usage %, clocks, and power draw (if available).
- Repeat once: if the second run is wildly different, your results are noisy (background tasks, thermal issues, power limits).
If your FPS looks fine but the game still feels rough, that is usually a frametime problem. Start with your stutter hub: Why Does My Game Stutter On High End PC, 11 Real Fixes.
How to Test CPU Performance for Gaming

GPUs get the glory, but CPUs decide whether your game collapses in busy scenes. If your frames drop in crowds, big fights, or open-world streaming areas, this is where you look.
- Run Cinebench (single-core and multi-core).
- Monitor temps while it runs. Short spikes are normal. Sustained heat is the issue.
- Watch clocks: if clocks drop hard while temps climb, you are likely throttling.
- Compare your score to similar CPUs (same model, similar power limits). Do not compare a laptop CPU to a desktop CPU and then spiral.
If you recently upgraded but performance feels unchanged, read Why Your PC Still Feels Slow After an Upgrade. It will save you from buying the wrong thing next.
Stress Testing Your PC Without Being Stupid
Stress tests are useful, but they are not the only way to measure performance. They are mainly for stability, thermals, and exposing weak cooling or power limits.
Safe rules that prevent regret:
- Start short: 5 to 10 minutes first. If temps are already wild, stop.
- Watch hotspot temps: GPU hotspot can be the real limiter even when “GPU temp” looks fine.
- Know your stop signs: crashes, driver resets, sudden reboots, or temps that keep climbing with no plateau.
- Do not stack torture: do not run FurMark plus Prime95 at the same time unless you are specifically testing power stability and you know your cooling is solid.
If your testing reveals throttling behavior, your next step is diagnosis, not panic upgrades. Use The Hidden Throttles Killing FPS as your “what to check next” guide.
How to Read Benchmark Scores Without Fooling Yourself
This is the part most people skip, then they complain their PC is “broken” because a Reddit screenshot looked higher.
- Compare like with like: same GPU model, similar CPU tier, same driver era, and similar power limits.
- Expect normal variance: small swings between runs are normal. Big swings mean noise, thermals, or background load.
- Resolution matters: some tests show different behavior depending on resolution and settings, even in the same benchmark suite.
- CPU can cap GPU: a strong GPU can still score lower if the CPU bottlenecks it in certain scenes.
- Thermals flatten scores: if your first run is strong and your second run drops, you might be heat-limited.
Quick reality check: if you are roughly within the expected range for your hardware, your PC is probably fine. If you are way under, you need to find out whether the limiter is heat, power, drivers, or background load.
If you want a stability-friendly approach after you measure, consider reading Why Capping Your FPS Is Better. It can improve consistency and reduce heat without nuking your visuals.
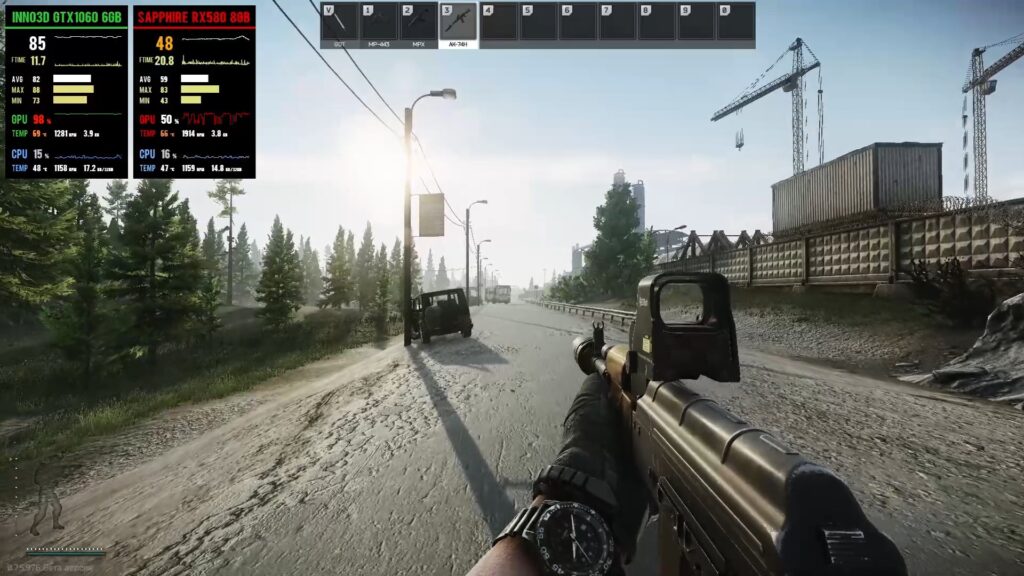
Real Game Testing vs Synthetic Benchmarks
Synthetic benchmarks are great for repeatability. Real games are great for reality. You want both, but for different reasons.
- Use synthetic benchmarks to compare your hardware to similar systems, and to see repeatable thermal behavior.
- Use real games to see stutter, streaming behavior, frametime spikes, and “this feels bad” problems that synthetic tests can miss.
If you want a real-world example of CPU bottlenecks and frametime behavior, use this case study: Counter-Strike 2 Performance, Why Your GPU Upgrade Didn’t Help.
Signs Your Gaming PC Is Underperforming
If you feel like your rig is slacking off, you are probably not imagining it. Here are the common signs that performance testing will confirm:
- FPS drops in busy scenes, even when average FPS looks fine
- Random stutters that show up in frametime graphs
- Fans going full turbo just to maintain “okay” performance
- Benchmark results far below expected ranges for your hardware
- Repeated crashes during load, even when temps look “acceptable”
When the symptoms are stutter-heavy, start here: Why Does My Game Stutter On High End PC. or If your system shows performance spikes during testing, you may also notice sound distortion while gaming. Our guide on fixing audio crackling in games explains how to solve these audio issues.
Quick Performance Sanity Fixes Before You Upgrade
This is not the “18 fixes” section. This is the quick sanity pass that prevents dumb conclusions.
- Update GPU drivers and reboot.
- Kill background apps that steal CPU or RAM.
- Check temps under load and confirm you are not throttling.
- Lower heavy settings first (shadows, volumetrics, post-processing) before dropping resolution.
- Keep tests consistent so you can actually compare results.
If you want the full safe-maintenance route after you measure, use PC Maintenance & Optimization Guide.
Also, storage can skew results, especially in open-world streaming or games that constantly load assets. If your test games live on a slow drive, you are testing your patience, not your PC. See Best External SSDs for Gaming for consistent game library testing.
Testing Stability Toolkit: What I Actually Use
This is not benchmark software. You already have those tools above. This is the small hardware side of the toolkit that keeps your test results stable and repeatable.
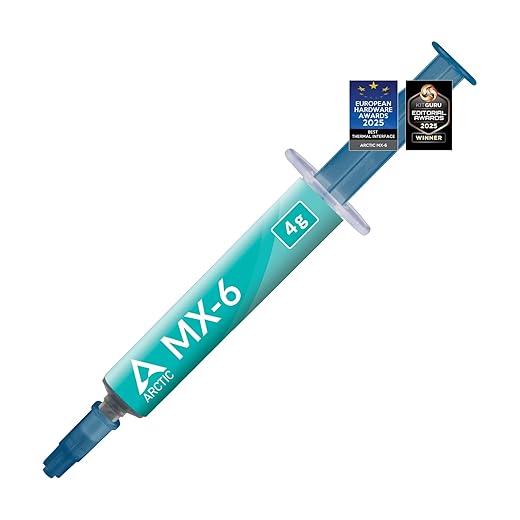
Bad airflow, weak cooling, or dried-out thermal paste can drag clocks down and fake a “low performance” result. Before you blame your CPU or GPU, make sure your thermals are not sabotaging your numbers.
These picks are simple, proven helpers that improve cooling and load stability so your benchmark runs reflect real capability, not heat limits.
Budget Tier Toolkit


Value Tier Toolkit


Top Tier Toolkit


Counter-Argument: When You Should Not Stress Test
Here is the part most “benchmark guides” never admit: you do not always need a torture test.
Stress tests are best for stability checks, cooling validation, and diagnosing hard limits. But in many real gamer scenarios, they are overkill:
- If your only goal is “does my game run smoothly,” a consistent in-game test is often more useful.
- If you are on a laptop or a tight prebuilt, synthetic torture loads can hit power limits that normal games never reach.
- If you are troubleshooting stutter, frametimes and real gameplay tell you more than a 10-minute furnace run.
Use stress tests intentionally. If you want performance fixes, route to the fix guides after you measure. This article is about measurement, not becoming your own warranty department.
FAQs: How to Test Gaming PC Performance
How long should I run a stress test?
Start with 5 to 10 minutes to check temperature behavior and stability. If temps plateau and everything stays stable, you can extend to 20 to 30 minutes for confidence. If temps keep climbing, stop and address cooling first.
What are safe temperatures while testing?
It depends on your hardware, but sustained high temps with dropping clocks usually means throttling. Focus on whether temps stabilize and whether clocks stay consistent, not just a single scary number.
What is the best way to test FPS in games?
Use an overlay (MSI Afterburner) and test the same scene with the same settings. Record average FPS and pay attention to stutters, which usually show up as frametime spikes.
Why is my benchmark score lower than expected?
Common causes include thermal throttling, background apps, power limits, driver issues, and mismatched comparisons. Read the “How to Read Benchmark Scores Without Fooling Yourself” section and compare like with like.
Should I benchmark before upgrading?
Yes. Benchmarking gives you proof of what is limiting performance. Otherwise you are buying parts based on vibes, and vibes are expensive.
Conclusion: Test First, Fix Second
You do not need to be a tech wizard to learn how to test gaming pc performance. You need a repeatable process, basic monitoring, and enough restraint to stop when the data says “cooling first.”
Measure your GPU and CPU, check temps and stability, then interpret your results like a sane person. If the numbers say you are fine, you are fine. If the numbers say something is limiting you, you now have proof, and you can fix the right thing instead of buying the wrong thing.